I will start to slowly review my gear (those camera, lenses, accessories) slowly here to share some experience ..
some may not be mine but belong to my gang or Lee Photo , thanks Lee to allow me to test or special order some of the accessories so far and I managed to compare, test or know the quality of my purchase before I really own it ....
today I will start with one of my important Landscape accessories, ND filter ... but I refer to ~10stops filter ....
I own bot Schneider ND110 & Lee filter big stopper so I will show some samples here... sorry for not able to rent a nd400 (HOYA) to test together ....
Schneider nd1000x
- own this ~2 year ago
- screw in
- same as other 10 stops filter total dark
Lee Filter - Big Stopper
- just got this with special order .. world wide no stock ???? for months
- square so can use with my standard Lee filter bracket or Cokin Z series holder
- same as other 10 stops filter total dark
as mentioned above, total dark .. so how to use this ????
1. custom functions to 1/2 stops ass appose to 1/3 as it comes on default
2. without the ND filter, set to MF
3. focus and read the exposure time (remember it with aperture)
if screw in type
4. if use screw type, remove UV filter and screw in nd filter
5. if GND need to be use put on filter holder and put in GND (not easy to handle this as you not really know where to position yours' GND
if square type
6. position yours' GND
7. slot in the Big Stopper (this is where I prefer to use my Big Stopper now !).. it is so easy to use together with other filters
8. from the exposure reading above, use below method to calculate the right exposure
1/4000 1/2000 1/1000 1/500 1/250 1/125 1/60 1/30 1/15 1/8 1/4 1/2 1(second) 2s 4s 8s 15s 30s 1(minute) 2min 4min 8min 16min 30min 1hour 2h 4h 8h
if you have exp
15s at F8 , ISO1600
why I use high ISO
- easy to get exposure reading even with 10 stops
- for ISO1600, and I know from ISO1600 -> ISO100, I going to brighten in 4 stops
if with 10 stops filter the reading is 15s @ISO1600
- so while I use ISO100, I need 4 stops brighter
- then I need 4 minutes exposures to get it right @ISO100
so is this easier ? just make a table print it and bring it with u any where :D
or if you purchase Big Stopper , the table will be included in the package ..
9. if ~30s then bulb require to make the right exposure
10. please take note while shooting dawn and dusk ... light change very fast .... you may manual compensate +-1/3 stops base on the time you shoot and light
after above how I use the nd filter, let's look at the filter samples
1. all above shoot very close timing with tripod, AWB, same ISO and sam aperture... same raw--->jpeg setting
- without any filter
- no correction of WB or color cast
2.with Schneider nd1000x
- the magenta cast is bad for me
3. with Lee Filter Big Stopper
- the blue cast look bad to me too
so both give a bad cast to me .. so I have to shoot in raw (I always shoot raw some how), and correct the WB and color cast simply use the camera raw WB tool (click on the white point and move around)..
by simple click
both above pictures below are corrected pictures(exposures may be different due to the light change or the filter still have slight stop different
even-though both still provided different result but it look close to the original WB and color cast make use of grey card/white paper or some manual adjustment may help to approach more natural WB and colors .....
for me , I prefer Big Stopper as I can easily combine to use with GND filter ... even though
a blog share how, where, what, when my MACRO/Nature related information's.
Tuesday, November 30, 2010
Monday, November 29, 2010
How I Shoot Landscape - Shoot under the rain
we having real bad weather recently .. either cloudy, hazy ... or rain almost everyday ... but again and again , we never give up and we managed to enjoy beautiful sunrise and sunset for last weekend ....
Every time rain, I telling my friend .. "no worry, canon weather proof mah .." so do I shoot under rain? Yes and no ... I never know how to verify how many ml/m or ml/feet .. :D so I judge myself every time... is it worth to shoot even rain ? and I continue shoot most of the time if the rain do not hit on to my len :D
so when I 1st meet horn-frog in wild

it was heavy rain in the jungle ... I saw it ... how I resist to have few shot .. :D
last Saturday, I went out for a sunset outing and most of my gang never give up even raining. We setup our gear and wait for the light to appear ....
so how I call weather proof :D
haha .. normally I use rain coat for my camera so I will be all wet while waiting for the moment .. but this time I use umbrella .. thanks Suzanne Chew for the umbrella (think it was for me but end up I use it for my camera)...
both pictures above also capture using Canon :D (Canon Ixus :D )
so what I waiting for ?
... never give up ...
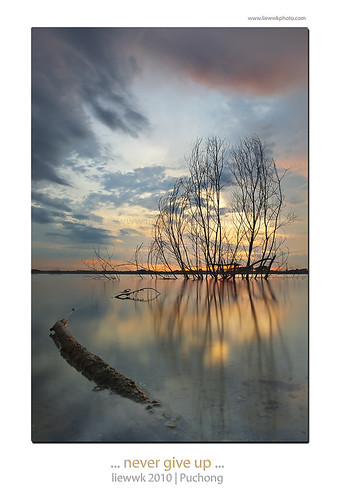
worth the wait ?
some of my "crazy gang waiting shot (different date) and thanks Alexander Poh for the lake location and the capture ....
Every time rain, I telling my friend .. "no worry, canon weather proof mah .." so do I shoot under rain? Yes and no ... I never know how to verify how many ml/m or ml/feet .. :D so I judge myself every time... is it worth to shoot even rain ? and I continue shoot most of the time if the rain do not hit on to my len :D
so when I 1st meet horn-frog in wild

it was heavy rain in the jungle ... I saw it ... how I resist to have few shot .. :D
last Saturday, I went out for a sunset outing and most of my gang never give up even raining. We setup our gear and wait for the light to appear ....
so how I call weather proof :D
haha .. normally I use rain coat for my camera so I will be all wet while waiting for the moment .. but this time I use umbrella .. thanks Suzanne Chew for the umbrella (think it was for me but end up I use it for my camera)...
both pictures above also capture using Canon :D (Canon Ixus :D )
so what I waiting for ?
... never give up ...

worth the wait ?
some of my "crazy gang waiting shot (different date) and thanks Alexander Poh for the lake location and the capture ....
*** please do not follow their action .. if you love yours; camera :D
Sunday, November 28, 2010
How I Shoot Landscape - shoot the stars
last 2 nights, spend hours to chase star and trying to capture in .... again weather not really at our site .. seem the cloudy days will be still with us ....
it is not difficult to shoot stars, and let me share some of my experience
if you do not have extra telescope equipment (e.g.Losmandy G11 with Celestron C8), we can either shoot a star trail or max ~30-50s else the star will be look like a small lines instead of blinking stars
- I do not own one those equipment so I do not know in depth .. but basic is those equipment will auto trace the stars so we can have longer exposure (which really need it while in real dark environment and do not want to shoot super high ISO
so ... I shoot as below
1. star trail
a. in real dark environment, make a rough estimation of exposure with setting below
i. biggest aperture as possible
ii. infinity focus
iii. manual focus
iv. mirror lock up
v. high ISO normally I use ~400-1600 depend the environment
vi. for the exposure depend on the light pollution ... may need few try to get right exposure
vii. shoot 2 picture .. the sky one could be very long and make the foreground over expose. so shoot another exposure for foreground
b. not so dark environment
i. biggest aperture as possible
ii. infinity focus
iii. manual focus
iv. mirror lock up
v. high ISO normally I use ~400-1600 depend the environment
vi. shoot 10-30s depend how bad is the light pollution
vii. set shooting mode to continuous shooting, and use remote to continue shooting for >20mintues (you should see some line or curve depend which direction you face)
viii. shoot 2 picture .. the sky one could be very long and make the foreground over expose. so shoot another exposure for foreground
viiii. use a software call startrail.exe (google it) and it can auto stack the all shots into single frame which combine the star as line/curve
x. shoot north and south :D , if possible... if you prefer circle/curve compare to lines
xi. I use a software load into my android call skymap .. real coold application, you should have it , if you love night photography
or .. for both shooting for sure you need a clear sky which mean better planning and luck :D
sample from last 2 nights
1. sample at not so dark or even quite bright area ...
canon 5dm2 +1635L@16mm+168 exp
# Exposure Time (1 / Shutter Speed) = 8/1 second ===> 8 second
# Lens F-Number / F-Stop = 28/10 ===> ƒ/2.8
# ISO Speed Ratings = 400
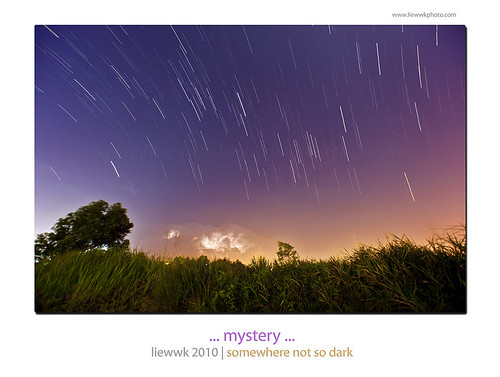
which I do not have luck
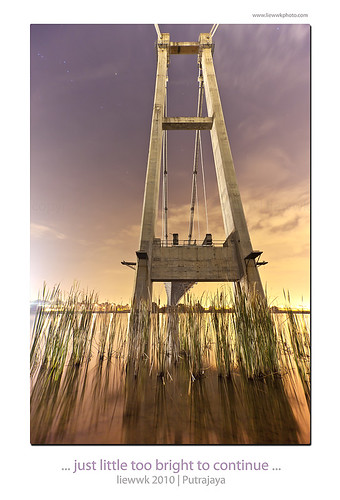
... Time-lapse while waiting for the clear sky ...
or better view @
http://www.liewwkphoto.com/still/Putrajaya/28Nov2010/Putrajaya28112010.htm
2 sample under bit dark area
a. long exposure method
apply with some black card method
5dm2, SIGMA 1224@12mm, tripod, cable release
# Exposure Time (1 / Shutter Speed) = 727/1 second ===> 727 second
# Lens F-Number / F-Stop = 5/1 ===> ƒ/5
# ISO Speed Ratings = 400

images stack method

hope this give some ideas how I shoot stars ..
it is not difficult to shoot stars, and let me share some of my experience
if you do not have extra telescope equipment (e.g.Losmandy G11 with Celestron C8), we can either shoot a star trail or max ~30-50s else the star will be look like a small lines instead of blinking stars
- I do not own one those equipment so I do not know in depth .. but basic is those equipment will auto trace the stars so we can have longer exposure (which really need it while in real dark environment and do not want to shoot super high ISO
so ... I shoot as below
1. star trail
a. in real dark environment, make a rough estimation of exposure with setting below
i. biggest aperture as possible
ii. infinity focus
iii. manual focus
iv. mirror lock up
v. high ISO normally I use ~400-1600 depend the environment
vi. for the exposure depend on the light pollution ... may need few try to get right exposure
vii. shoot 2 picture .. the sky one could be very long and make the foreground over expose. so shoot another exposure for foreground
b. not so dark environment
i. biggest aperture as possible
ii. infinity focus
iii. manual focus
iv. mirror lock up
v. high ISO normally I use ~400-1600 depend the environment
vi. shoot 10-30s depend how bad is the light pollution
vii. set shooting mode to continuous shooting, and use remote to continue shooting for >20mintues (you should see some line or curve depend which direction you face)
viii. shoot 2 picture .. the sky one could be very long and make the foreground over expose. so shoot another exposure for foreground
viiii. use a software call startrail.exe (google it) and it can auto stack the all shots into single frame which combine the star as line/curve
x. shoot north and south :D , if possible... if you prefer circle/curve compare to lines
xi. I use a software load into my android call skymap .. real coold application, you should have it , if you love night photography
or .. for both shooting for sure you need a clear sky which mean better planning and luck :D
sample from last 2 nights
1. sample at not so dark or even quite bright area ...
canon 5dm2 +1635L@16mm+168 exp
# Exposure Time (1 / Shutter Speed) = 8/1 second ===> 8 second
# Lens F-Number / F-Stop = 28/10 ===> ƒ/2.8
# ISO Speed Ratings = 400

which I do not have luck

... Time-lapse while waiting for the clear sky ...
or better view @
http://www.liewwkphoto.com/still/Putrajaya/28Nov2010/Putrajaya28112010.htm
2 sample under bit dark area
a. long exposure method
apply with some black card method
5dm2, SIGMA 1224@12mm, tripod, cable release
# Exposure Time (1 / Shutter Speed) = 727/1 second ===> 727 second
# Lens F-Number / F-Stop = 5/1 ===> ƒ/5
# ISO Speed Ratings = 400

images stack method

hope this give some ideas how I shoot stars ..
Thursday, November 25, 2010
How I Shoot Landscpae - some basic
I think this is my 1st share on "how I shoot landscape", I am still far to learn at landscape photography. for me it is real challenge compare to what I did before ..... while you shoot landscape you need
1. luck - weather not control by us
- you have right weather do not mean you at right place
- need to understand the light .. what's the best time for this angle ... sunset , sunrise ... magic hour etc ... need to know what light you need but then it is very much depend your' luck... even though sometime weather forecast do help
2. need more understanding of yours' camera
- how to change WB (which I seldom do this previously)
- what is hyperfocal distance of each focal length
- need good skill to control yours' tripod. the light could be just appear for seconds ...
- exposures bracketing (need for exposure masking, HDR ....)
- calculation of exposure under bulb mode
overall we need to understand our equipment especially our camera ... so read manual, internet guidance .... before go out else you may miss the great view ....
3. composition
- one of the most challenge ... nowadays, think many of us try to no shoot the main object directly but with add on some blocking object thought it is composition then we are wrong .... it is just call foreground inside the frame but not composition
- this sound very simple ... some thing make viewer feel comfortable ... simple ???? but it is not
- it should have some line (U, L, J, triangle ....) leading from sky to object to the foreground, symmetry, rule 2/3, keep in simple ... you may come with it , learn it from forum, pictures sharing web site , books ......(but prefer to learn from few peoples or forum instead one ... )
- do not fully addict to one style while learning, try learn all methods or understand then choose yours' style later after build all the foundation. e.g. shoot basic landscape before learn exposures masking then HDR ... then use filters ....
4. environment
- need to study what time the sunrise and sunset
- tide table
- moon table especially for nightscape
- temperature
5. stamina
- need minimum hiking, jungle trekking to get to the beautiful places
6. choose right equipments
- tripod .... choose those withstand salt water, mug ...weight will kill while have hiking
- lenses .... need full focal length else you may miss out what you want. weather seal is recommended
- camera .... good dynamics range, weather seal is highly recommended.. weight
- beg .... multiple begs require for different location, weight of the beg
- filters .... need different filters for different effect or capture. CPL, ND, GND ....
- transport .... eventually you may need 4WD to access some beautiful places
7. post processing
- it really help to improve the final output
- not doing the super impose
- clone dusts, increase contrast, increase saturation, masking for exposures ... noise reduce are basic requirements
- shoot raw in case WB need to be change so it can be done easily
- color cast remove easier by using RAW too
- calibrate monitor
so all I learn now ... may keep update while I find something I need to add on .. and will discuss each in details slowly in future ...
Wednesday, November 10, 2010
other - missing the star
http://www.flickr.com/photos/liewwk/sets/72157625036722574/with/5160885453/my star chasing have stop for months, and due to I stay in a town full with light pollution so I need to travel far to see stars clearly..... the weather also stop me to do so....
my last star shoot ... and I miss this place very much ~3.5 hours travel from city .. so should I plan one this month ? but weather just bad ...90% of the sky cover by clouds for weeks...
Kemasik beach, Terengganu , Malaysia
more picture for beautiful Terengganu click here
my last star shoot ... and I miss this place very much ~3.5 hours travel from city .. so should I plan one this month ? but weather just bad ...90% of the sky cover by clouds for weeks...
Kemasik beach, Terengganu , Malaysia
more picture for beautiful Terengganu click here
Tuesday, November 9, 2010
Landscape Spot - Masjid As-Salam
a beautiful gem found near by city where I live, all the this while I had miss DQ Mosque and dreaming of the beauty of the mosque (last visit March 2010).... below are some beautiful pictures of the mosque
Selangor
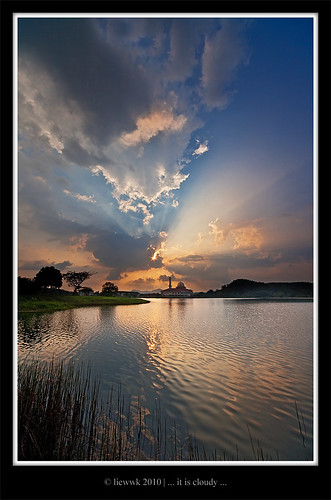
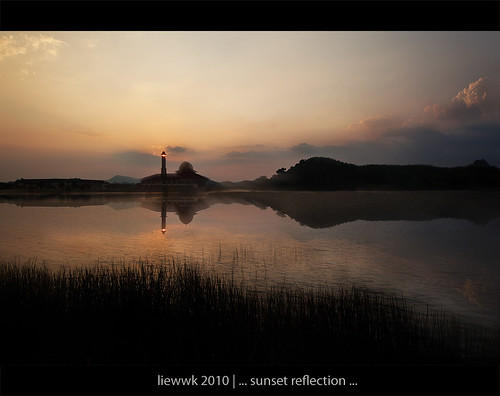
more pictures from the same Mosque click here
but I didn't know another beautiful Mosque (Masjid As-Salam) just ~15minutes drive from my house .... this Mosque is some where near Puchong Perdana, Puchong .... (can easily search Masjid Terapung at Puchong) and it have a lake just infront of the mosque which good for sunrise ...
- ~20minutes drive from Kuala Lumpur center
The lake give beautiful reflection while the wind is not strong ......
few capture from the beautiful mosque
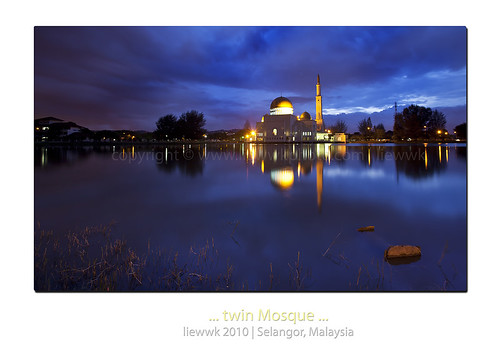
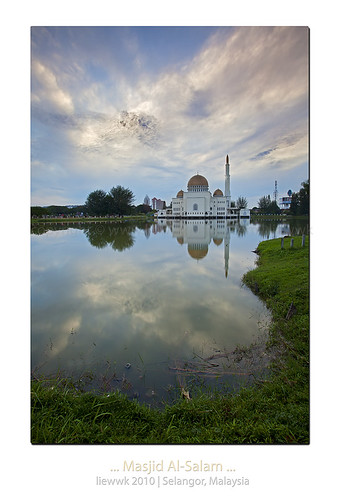
more Kuala Lumpur (the city I stay) click here
Selangor


more pictures from the same Mosque click here
but I didn't know another beautiful Mosque (Masjid As-Salam) just ~15minutes drive from my house .... this Mosque is some where near Puchong Perdana, Puchong .... (can easily search Masjid Terapung at Puchong) and it have a lake just infront of the mosque which good for sunrise ...
- ~20minutes drive from Kuala Lumpur center
The lake give beautiful reflection while the wind is not strong ......
few capture from the beautiful mosque


more Kuala Lumpur (the city I stay) click here
Subscribe to:
Comments (Atom)


