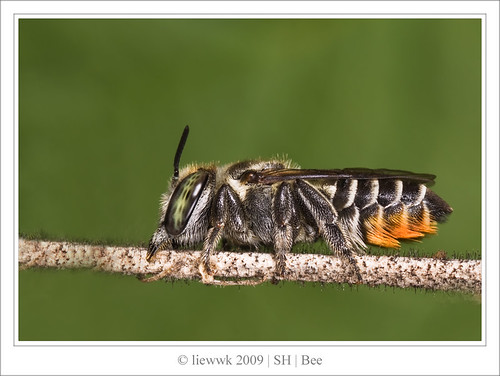
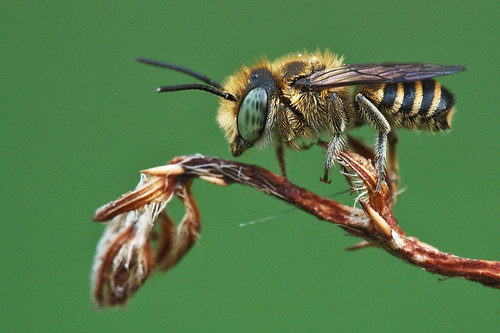
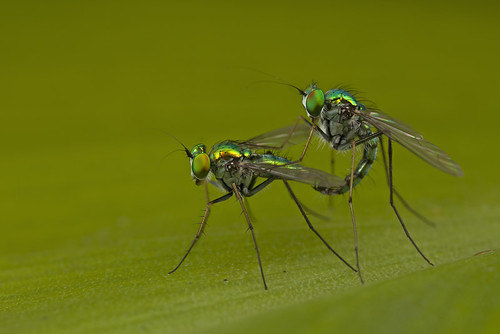
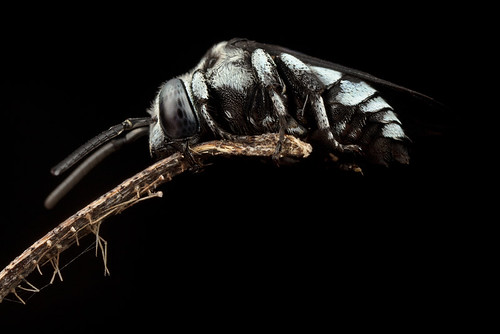
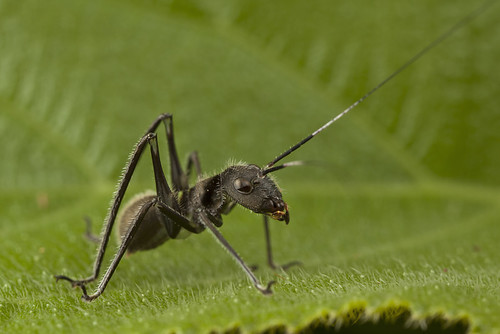
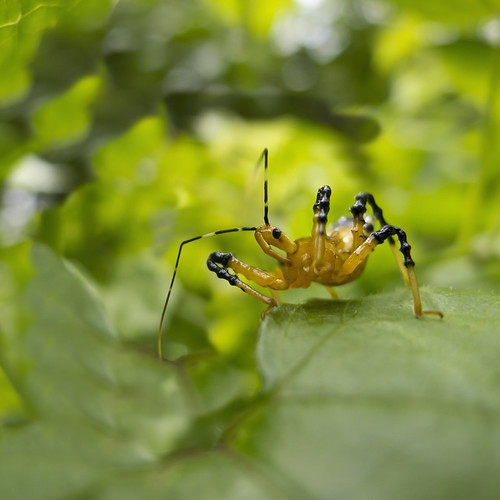
managed to try out 1cm MACRO today
it is fun to use PnS to do MACRO .... Liveview focus so easy ... AF ...... no need flash :D
non edit, non crop(shoot in Square), non curve, no change saturation .... noise reduce and resize only .....
this was shooting with my new gear family
http://liewwk-macro.blogspot.com/2010/12/my-gear-pns-camera-panasonic-lx5.html
a blog share how, where, what, when my MACRO/Nature related information's.
Friday, December 31, 2010
Thursday, December 30, 2010
My Gear - PnS Camera Panasonic LX5
Mr 1st LEICA !!!!
finally I had make decision for my spare body .... a Panasonic Lumix DMC-LX5....
think too many people give review to this camera, and I am not going to share one now but my 1st hand experience
1. a solid point and shot
2. 1cm macro is fun (I am back with so much of DOF now)
3. image quality , from the screen is great
4. size much smaller than my 5d but slightly bigger than my Ixus700
5. for a new user (1st time using Panasonic camera), I understand and know where to set most of the basic requirement setting in ~10 minutes .. so this is consider a very user friendly PnS
will shoot more pictures using this camera to share more actual IQ concern :D
Full Specification can easily get from google or http://www.dpreview.com/news/1007/10072110panasonicdmclx5.asp
the main specifications that make me choose this
1. 24mm wide angle
2. aperture f2.0
3. proven IQ LX3
4. shutter speed 30-60s (24mm F2 @60s ... good for star :D)
5. 1cm MACRO
.....
Wednesday, December 29, 2010
New Found - a Mayfly in Hotel room !!!
was surprise last trip to Terengganu, where we found 3 types of mayflies, soldierfly, beetle, ... in the hotel room itself ..........................
this is like other mayfly, not really move a lot and quite small ~5-7mm long .....
more flies pictures
this is like other mayfly, not really move a lot and quite small ~5-7mm long .....
more flies pictures
Tuesday, December 28, 2010
How I shoot MACRO - Patient to wait
love to do night macro but some of the insect may not active or sleeping in the night and it is good to shoot them while sleeping as in daylight you may not possible to shoot it .. e.g. bee, the bee use to flying around non-stop and not easy to have a capture of it in the day light but at night it will sleeping as
- it seldom move, or we can move it any location/direction to capture a beautiful sleeping style
but I getting bore after a while looking at this beautiful bee sleeping .. so I decide to mark the location and go back in the early morning (just before the bee wake up) , what I going todo
- wake up early (~6-630am)
- go back to the mark location
- use tripod to aiming or pre-focus to the bee
- wait ................................. it may wake up 1-1.5hr later :D so patient is important here
- the moment it wake up, it will stay still for ~5-30s depend on luck
- do not touch it to make it wake up this will make it flew off within 2-5s after we touch it
then with all the efforts above ...
or recently
Monday, December 27, 2010
News - Basic MACRO Workshop (Jan 2011)
As special requested for Jan 2011, I have additional workshop happen on 16- 17 Jan near Genting, Pahang area.
it going to be 2days 1 night sharing, which include
1. travel from/return PJ/KL to Genting area
2. max 5 participants but 3 are fill so 2 left
3. accommodation include
4. 1 breakfast, 2 lunch, 1 dinner included
5. theory sharing for basic requirements for Nature - MACRO photography
- gears basic
- setting basic
- lighting advices and DIY diffuser base on participant current setup
6. Basic Post Processing with Photoshop
- WB correction
- color cast remove
- sensor dusts handling
- basic curve and saturation
- cloning
- noise reduction
7. practical shooting with recommended method
- basic MACRO shooting skill
- flash shooting and natural light
Who should attend
- those have basic knowledge of photography and would like to know more on MACRO
What should bring
- Camera (DSLR will be recommended)
- MACRO len, if no MACRO len let me know more what do you have and we will arrange loan equipments
- flash (external prefer)
- tripod and monopod
- clothes for change
- notebook is recommended
for more details, contact me here
They are back !!!
Cuckoo Bee - Thyreus sp
found back those bee use to stay near my In-law garden ... and most of them back !!! for what happen previously for this "small jungle" pls refer
http://liewwk-macro.blogspot.com/2010/06/news-another-sad-news.html
but too bad for Wee & Tan who missed this as we only found them 2nd day ....
I also found Owl-fly which is 1st time for me to see it in wild and it is so near to me ....
Tuesday, December 21, 2010
New Gallery for www.liewwkphoto.com - Slow Shutter
http://www.liewwkphoto.com/gallery6.htmWe need to give good respect to people doing a lot of slow shutter photography... their patient to have better work need to respect ......
every shots could toke easily from 15s up to minutes... or even hours ... but it may not come out good due to composition, light change affect final output, wind shake, wave shake ....
every one extra stop we are talking in slow shutter could be in minutes ...
e.g. while we have correct exposure @30s but as for the light change (getting dark) due to sunset, we may need to have extra 1-2 stop where we are talking
30s extra exposure for 1 stop and 90s extra exposure for 2 stops .... as long as the calculation is wrong .... then everything have to reshoot, re-calculate again .......
I am shooting slow shutter witheither
1. night scape
2. B+W ND1000x
3. Lee Filter - Big Stopper
where discuss before @
http://liewwk-macro.blogspot.com/2010/11/my-gear-10-stops-nd-filters-b-w-nd100.html
after few shooting, I start love the slow shutter photography and promise to shoot more and share more .... and a New Gallery create for www.liewwkphoto.com
Slow Shutter - Gallery 6
thanks all ....
Thursday, December 16, 2010
New Found - A Ant ? Katydid ? Hopper ? Cricket ?
Thursday, December 9, 2010
New Found - A cute weevil
An old picture or capture while I was at Kota Kinabalu Park (KK) , this beetle is ~5-8mm in size and look real cute ...
not really move alot may be due to cool weather ... but still floew off after ~3 shots, may be my diffuser is too close to it
more beetle/weevil collection
http://www.flickr.com/photos/liewwk/sets/72157605373755899/with/5245543500/
not really move alot may be due to cool weather ... but still floew off after ~3 shots, may be my diffuser is too close to it
more beetle/weevil collection
http://www.flickr.com/photos/liewwk/sets/72157605373755899/with/5245543500/
Wednesday, December 8, 2010
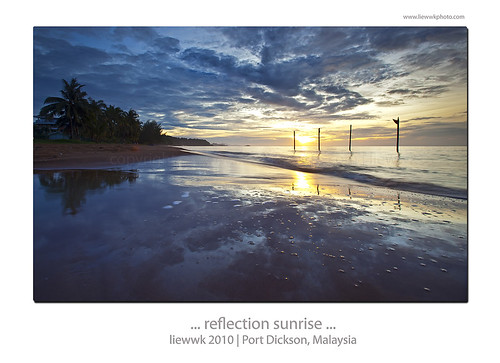
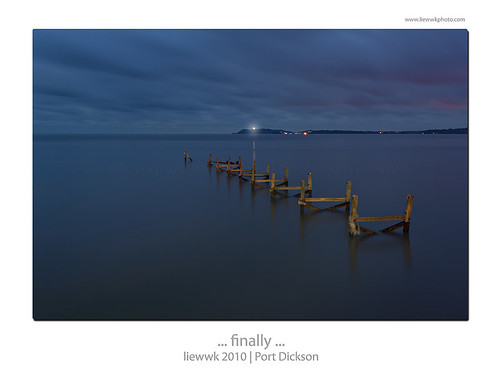
Landscape Spot - Sunrise @Pantai Cermin, Port Dickson
last weekend, have few good discover.. few good spots for sunset... and another wonderful sunrise spots found beach @Port Dickson (west coast of Malaysia) think many people will ask why can shoot the sun rise from the horizon ... :D
so the simple answer is as for now, the sun rise from east south so as the beach location it face east south and a river on east if we move ourselves along the beach ........
not only the sunrise surprise me but the reflection of the beach ..... I wonder why it call Mirror Lake (Pantai Cermin) while I was there few times .. but now I may know why it call such name ... the beach itself is nature mirror of the beautiful sky/sunrise, while I look for better foreground (sorry not much foreground can be found here especially high tide), I found the beach itself will become reflective after ~2-3 s after the wave hit the beach and it will disappear in few seconds too (after the water dissolve/penetrate into the ground).... the sunrise not really beautiful but I still share few pictures of this outing due to the nature beauty of this beach ....
and a series of pictures show how's the reflection come and go
I will definite will re-visit this place ...and share more soon....
location
- from Kuala Lumpur, South (Melaka, Johor, Singapore) from North south Highway
- look for Port Dickson out
- then look for Port Dickson (highway will be much easier/faster to access this beach) so follow Port Dickson (green board)
- follow the highway, you should reach to a roundabout ... don't worry look for Tanjung Tuan lighthouse direction
- before reach Tanjung Tuan
it is a right turn to famous Tanjung Biru (Blue Lagoon) and Pantai Cermin is on yours' left instead
Monday, December 6, 2010
My Gear - GND and 10 Stops ND filters
just a quick share why I use GND or 10 stops ND filters in some case
1. the sky and foreground always have different of exposures and I do not want to use exposures blending, HDR and black card method to correct the exposure ...
e.g. original shot , no PP no filter, the sky look lost some highlight details especially the clouds
2. to get the correct exposure of the sky then foreground will look under
3. to correct the exposures, I normally use
i. Lee Filter GND filter
ii. Exposures masking (shoot multiple pictures to merge it)
iii. HDR
iv. black card, only apply while long exposure
but for this I only want to disucss 3i (Lee Filter GND)
4. to correct it normally I use Graduate Nature Density filter (GND) to correct the exposure of the sky or get more details of the sky without changing the foreground exposure
- with the help of the GND I have both sky and sea at right exposure with minimum effort
5. but for this type of weather, the sky may look dull and not so attractive.. so I make use of the bid stop ND to make the water look silky and the cloud movement ......
the exp from 1/5s to 140++s which allow us to see the movement line of the clouds to create more attractive sky and silky sea
and with proper planning here is my result
I will share how to use exposures masking, Photoshop GND ... in future ....
Landscape Spot - Port Dickson 1 [Pantai Pasir Panjang]
it is not my 1st time visit this place .. but last week we make final decision to drop by and spent a wonderful evening with my gang [shunfa, Lio, Xiao Yi & Ken]....
it is locate almost end of famous beach Port Dickson where almost reach Melaka.
direction
- from Kuala Lumpur, South (Melaka, Johor, Singapore) from North south Highway
- look for Port Dickson out
- then look for Port Dickson (highway will be much easier/faster to access this beach) so follow Port Dickson (green board)
- follow the highway, you should reach to a roundabout ... don't worry look for Tanjung Tuan lighthouse direction
- then look for Pantai Pasir Panjang (which is ~12km to the destination)
- this place locate near Ikan Bakar Pantai Pasir Panjang
this place facing sunset so this is a good sunset spot with Tanjung Tuan Light house locate at far (but after dark you still view the light house lihgt)
e.g.
few advice .
1. take note of yours' tripod .. many fisherman walk around .. so may accident "kick" yours' tripod into sea
2. do not look for 2nd seafood store (the center one).. it took hours to serve even not much customer (ouckesssssssss, we are 2nd table and wait ~1.15 hours for our dishes to server)
3. mosquitoes after dark
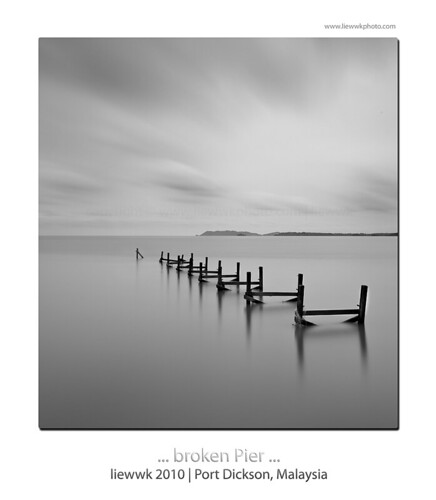
4. plan with tide level if you want different view of the pier
5. beach is further in the ikan bakar store so if bring family have to plan for this as this spot do not have beach
......
an old shot
happy shooting .........
Friday, December 3, 2010
My Gear - LP-E6 (a.k.a Battery)
As mentioned, slowly discuss all my equipments so I can't remember what I use after years later :D
from 3++ years ago, Sony a200, a700, 50d... all previous experience I did minimum own 3-4 batteries but until I own Canon EOS 5dm2, I still own 2 as today .. why .. this battery is so expensive .. ~RM330 (USD100) per pcs .. wow .......and there is no proven real good oem battery so far ... hmmm but recently someone told me another brand (OEM), and I just ordered online and hope it is real good and then I will share it here again....
so what so great of this battery ? the % .... it tell truth ,mean it tell you 5% mean you only have 5% to use not like previous battery even you see 1/3 bar but then it could just turn off your camera in 30s, you won;t know yours' actual remaining capacity. but for this .. it is so accurate ..
and how lasting ? hmmm if I shoot macro (non Liveview) with moderate preview .. it can easily shoot up to ~400-500 pictures ..... but while I shoot landscape, where I 95% use liveview and preview moderate, it only can last ~150-200 pictures and depend on the places I shoot (highland ... cold season .. all count too) ....
and why suddenly I want to share this before other accessories, because to let other know ... don't save xx dollar and you may already spent xxxxx dollar on gears .. it is so important ... and let's me share an experience (yesterday)...
I was went out for a discussion, and we decided to choose a place where I shoot a ok ok picture ... (as my client would like to shoot too)
but then, while I reach .... I have my tripod, lee filters , lenses ready .. and spot ready ... while I turn on my battery .. my battery sign blinking .. aikssssssssssss.. goiks .. and I went check .. it left 4% ........................................... and the sunset look great ... so I can';t resist to shoot few .. but the sky just turn amazing ... and I know I left last chance, may be last shot or even less than 5 ............and the SKY keep turn so dramatic , and I ask where is ALEX as he use to be here everyday and he is my the only hope . but he didn't turn up as busy with work .....and I use my last battery available to capture a video to share
so look at this view , do you still want to save $ on yours' battery ????
Tuesday, November 30, 2010
My Gear - 10 stops ND filters (Schneider - nd1000x vs Lee Filter - Big Stopper)
I will start to slowly review my gear (those camera, lenses, accessories) slowly here to share some experience ..
some may not be mine but belong to my gang or Lee Photo , thanks Lee to allow me to test or special order some of the accessories so far and I managed to compare, test or know the quality of my purchase before I really own it ....
today I will start with one of my important Landscape accessories, ND filter ... but I refer to ~10stops filter ....
I own bot Schneider ND110 & Lee filter big stopper so I will show some samples here... sorry for not able to rent a nd400 (HOYA) to test together ....
Schneider nd1000x
- own this ~2 year ago
- screw in
- same as other 10 stops filter total dark
Lee Filter - Big Stopper
- just got this with special order .. world wide no stock ???? for months
- square so can use with my standard Lee filter bracket or Cokin Z series holder
- same as other 10 stops filter total dark
as mentioned above, total dark .. so how to use this ????
1. custom functions to 1/2 stops ass appose to 1/3 as it comes on default
2. without the ND filter, set to MF
3. focus and read the exposure time (remember it with aperture)
if screw in type
4. if use screw type, remove UV filter and screw in nd filter
5. if GND need to be use put on filter holder and put in GND (not easy to handle this as you not really know where to position yours' GND
if square type
6. position yours' GND
7. slot in the Big Stopper (this is where I prefer to use my Big Stopper now !).. it is so easy to use together with other filters
8. from the exposure reading above, use below method to calculate the right exposure
1/4000 1/2000 1/1000 1/500 1/250 1/125 1/60 1/30 1/15 1/8 1/4 1/2 1(second) 2s 4s 8s 15s 30s 1(minute) 2min 4min 8min 16min 30min 1hour 2h 4h 8h
if you have exp
15s at F8 , ISO1600
why I use high ISO
- easy to get exposure reading even with 10 stops
- for ISO1600, and I know from ISO1600 -> ISO100, I going to brighten in 4 stops
if with 10 stops filter the reading is 15s @ISO1600
- so while I use ISO100, I need 4 stops brighter
- then I need 4 minutes exposures to get it right @ISO100
so is this easier ? just make a table print it and bring it with u any where :D
or if you purchase Big Stopper , the table will be included in the package ..
9. if ~30s then bulb require to make the right exposure
10. please take note while shooting dawn and dusk ... light change very fast .... you may manual compensate +-1/3 stops base on the time you shoot and light
after above how I use the nd filter, let's look at the filter samples
1. all above shoot very close timing with tripod, AWB, same ISO and sam aperture... same raw--->jpeg setting
- without any filter
- no correction of WB or color cast
2.with Schneider nd1000x
- the magenta cast is bad for me
3. with Lee Filter Big Stopper
- the blue cast look bad to me too
so both give a bad cast to me .. so I have to shoot in raw (I always shoot raw some how), and correct the WB and color cast simply use the camera raw WB tool (click on the white point and move around)..
by simple click
both above pictures below are corrected pictures(exposures may be different due to the light change or the filter still have slight stop different
even-though both still provided different result but it look close to the original WB and color cast make use of grey card/white paper or some manual adjustment may help to approach more natural WB and colors .....
for me , I prefer Big Stopper as I can easily combine to use with GND filter ... even though
Monday, November 29, 2010
How I Shoot Landscape - Shoot under the rain
we having real bad weather recently .. either cloudy, hazy ... or rain almost everyday ... but again and again , we never give up and we managed to enjoy beautiful sunrise and sunset for last weekend ....
Every time rain, I telling my friend .. "no worry, canon weather proof mah .." so do I shoot under rain? Yes and no ... I never know how to verify how many ml/m or ml/feet .. :D so I judge myself every time... is it worth to shoot even rain ? and I continue shoot most of the time if the rain do not hit on to my len :D
so when I 1st meet horn-frog in wild
it was heavy rain in the jungle ... I saw it ... how I resist to have few shot .. :D
last Saturday, I went out for a sunset outing and most of my gang never give up even raining. We setup our gear and wait for the light to appear ....
so how I call weather proof :D
haha .. normally I use rain coat for my camera so I will be all wet while waiting for the moment .. but this time I use umbrella .. thanks Suzanne Chew for the umbrella (think it was for me but end up I use it for my camera)...
both pictures above also capture using Canon :D (Canon Ixus :D )
so what I waiting for ?
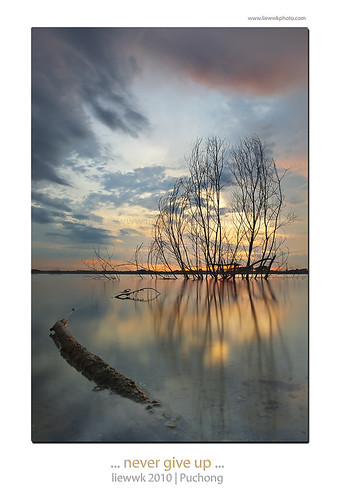
... never give up ...
worth the wait ?
some of my "crazy gang waiting shot (different date) and thanks Alexander Poh for the lake location and the capture ....
*** please do not follow their action .. if you love yours; camera :D
Sunday, November 28, 2010
How I Shoot Landscape - shoot the stars
last 2 nights, spend hours to chase star and trying to capture in .... again weather not really at our site .. seem the cloudy days will be still with us ....
it is not difficult to shoot stars, and let me share some of my experience
if you do not have extra telescope equipment (e.g.Losmandy G11 with Celestron C8), we can either shoot a star trail or max ~30-50s else the star will be look like a small lines instead of blinking stars
- I do not own one those equipment so I do not know in depth .. but basic is those equipment will auto trace the stars so we can have longer exposure (which really need it while in real dark environment and do not want to shoot super high ISO
so ... I shoot as below
1. star trail
a. in real dark environment, make a rough estimation of exposure with setting below
i. biggest aperture as possible
ii. infinity focus
iii. manual focus
iv. mirror lock up
v. high ISO normally I use ~400-1600 depend the environment
vi. for the exposure depend on the light pollution ... may need few try to get right exposure
vii. shoot 2 picture .. the sky one could be very long and make the foreground over expose. so shoot another exposure for foreground
b. not so dark environment
i. biggest aperture as possible
ii. infinity focus
iii. manual focus
iv. mirror lock up
v. high ISO normally I use ~400-1600 depend the environment
vi. shoot 10-30s depend how bad is the light pollution
vii. set shooting mode to continuous shooting, and use remote to continue shooting for >20mintues (you should see some line or curve depend which direction you face)
viii. shoot 2 picture .. the sky one could be very long and make the foreground over expose. so shoot another exposure for foreground
viiii. use a software call startrail.exe (google it) and it can auto stack the all shots into single frame which combine the star as line/curve
x. shoot north and south :D , if possible... if you prefer circle/curve compare to lines
xi. I use a software load into my android call skymap .. real coold application, you should have it , if you love night photography
or .. for both shooting for sure you need a clear sky which mean better planning and luck :D
sample from last 2 nights
1. sample at not so dark or even quite bright area ...
canon 5dm2 +1635L@16mm+168 exp
# Exposure Time (1 / Shutter Speed) = 8/1 second ===> 8 second
# Lens F-Number / F-Stop = 28/10 ===> ƒ/2.8
# ISO Speed Ratings = 400
which I do not have luck
... Time-lapse while waiting for the clear sky ...
or better view @
http://www.liewwkphoto.com/still/Putrajaya/28Nov2010/Putrajaya28112010.htm
2 sample under bit dark area
a. long exposure method
apply with some black card method
5dm2, SIGMA 1224@12mm, tripod, cable release
# Exposure Time (1 / Shutter Speed) = 727/1 second ===> 727 second
# Lens F-Number / F-Stop = 5/1 ===> ƒ/5
# ISO Speed Ratings = 400
images stack method
hope this give some ideas how I shoot stars ..
Thursday, November 25, 2010
How I Shoot Landscpae - some basic
I think this is my 1st share on "how I shoot landscape", I am still far to learn at landscape photography. for me it is real challenge compare to what I did before ..... while you shoot landscape you need
1. luck - weather not control by us
- you have right weather do not mean you at right place
- need to understand the light .. what's the best time for this angle ... sunset , sunrise ... magic hour etc ... need to know what light you need but then it is very much depend your' luck... even though sometime weather forecast do help
2. need more understanding of yours' camera
- how to change WB (which I seldom do this previously)
- what is hyperfocal distance of each focal length
- need good skill to control yours' tripod. the light could be just appear for seconds ...
- exposures bracketing (need for exposure masking, HDR ....)
- calculation of exposure under bulb mode
overall we need to understand our equipment especially our camera ... so read manual, internet guidance .... before go out else you may miss the great view ....
3. composition
- one of the most challenge ... nowadays, think many of us try to no shoot the main object directly but with add on some blocking object thought it is composition then we are wrong .... it is just call foreground inside the frame but not composition
- this sound very simple ... some thing make viewer feel comfortable ... simple ???? but it is not
- it should have some line (U, L, J, triangle ....) leading from sky to object to the foreground, symmetry, rule 2/3, keep in simple ... you may come with it , learn it from forum, pictures sharing web site , books ......(but prefer to learn from few peoples or forum instead one ... )
- do not fully addict to one style while learning, try learn all methods or understand then choose yours' style later after build all the foundation. e.g. shoot basic landscape before learn exposures masking then HDR ... then use filters ....
4. environment
- need to study what time the sunrise and sunset
- tide table
- moon table especially for nightscape
- temperature
5. stamina
- need minimum hiking, jungle trekking to get to the beautiful places
6. choose right equipments
- tripod .... choose those withstand salt water, mug ...weight will kill while have hiking
- lenses .... need full focal length else you may miss out what you want. weather seal is recommended
- camera .... good dynamics range, weather seal is highly recommended.. weight
- beg .... multiple begs require for different location, weight of the beg
- filters .... need different filters for different effect or capture. CPL, ND, GND ....
- transport .... eventually you may need 4WD to access some beautiful places
7. post processing
- it really help to improve the final output
- not doing the super impose
- clone dusts, increase contrast, increase saturation, masking for exposures ... noise reduce are basic requirements
- shoot raw in case WB need to be change so it can be done easily
- color cast remove easier by using RAW too
- calibrate monitor
so all I learn now ... may keep update while I find something I need to add on .. and will discuss each in details slowly in future ...
1. luck - weather not control by us
- you have right weather do not mean you at right place
- need to understand the light .. what's the best time for this angle ... sunset , sunrise ... magic hour etc ... need to know what light you need but then it is very much depend your' luck... even though sometime weather forecast do help
2. need more understanding of yours' camera
- how to change WB (which I seldom do this previously)
- what is hyperfocal distance of each focal length
- need good skill to control yours' tripod. the light could be just appear for seconds ...
- exposures bracketing (need for exposure masking, HDR ....)
- calculation of exposure under bulb mode
overall we need to understand our equipment especially our camera ... so read manual, internet guidance .... before go out else you may miss the great view ....
3. composition
- one of the most challenge ... nowadays, think many of us try to no shoot the main object directly but with add on some blocking object thought it is composition then we are wrong .... it is just call foreground inside the frame but not composition
- this sound very simple ... some thing make viewer feel comfortable ... simple ???? but it is not
- it should have some line (U, L, J, triangle ....) leading from sky to object to the foreground, symmetry, rule 2/3, keep in simple ... you may come with it , learn it from forum, pictures sharing web site , books ......(but prefer to learn from few peoples or forum instead one ... )
- do not fully addict to one style while learning, try learn all methods or understand then choose yours' style later after build all the foundation. e.g. shoot basic landscape before learn exposures masking then HDR ... then use filters ....
4. environment
- need to study what time the sunrise and sunset
- tide table
- moon table especially for nightscape
- temperature
5. stamina
- need minimum hiking, jungle trekking to get to the beautiful places
6. choose right equipments
- tripod .... choose those withstand salt water, mug ...weight will kill while have hiking
- lenses .... need full focal length else you may miss out what you want. weather seal is recommended
- camera .... good dynamics range, weather seal is highly recommended.. weight
- beg .... multiple begs require for different location, weight of the beg
- filters .... need different filters for different effect or capture. CPL, ND, GND ....
- transport .... eventually you may need 4WD to access some beautiful places
7. post processing
- it really help to improve the final output
- not doing the super impose
- clone dusts, increase contrast, increase saturation, masking for exposures ... noise reduce are basic requirements
- shoot raw in case WB need to be change so it can be done easily
- color cast remove easier by using RAW too
- calibrate monitor
so all I learn now ... may keep update while I find something I need to add on .. and will discuss each in details slowly in future ...
Wednesday, November 10, 2010
other - missing the star
http://www.flickr.com/photos/liewwk/sets/72157625036722574/with/5160885453/my star chasing have stop for months, and due to I stay in a town full with light pollution so I need to travel far to see stars clearly..... the weather also stop me to do so....
my last star shoot ... and I miss this place very much ~3.5 hours travel from city .. so should I plan one this month ? but weather just bad ...90% of the sky cover by clouds for weeks...
Kemasik beach, Terengganu , Malaysia
more picture for beautiful Terengganu click here
my last star shoot ... and I miss this place very much ~3.5 hours travel from city .. so should I plan one this month ? but weather just bad ...90% of the sky cover by clouds for weeks...
Kemasik beach, Terengganu , Malaysia
more picture for beautiful Terengganu click here
Tuesday, November 9, 2010
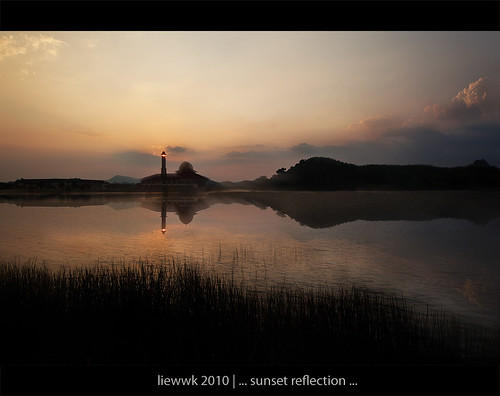
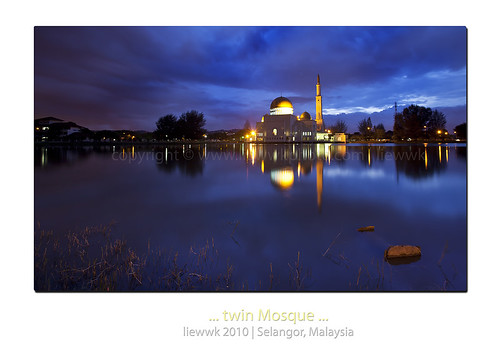
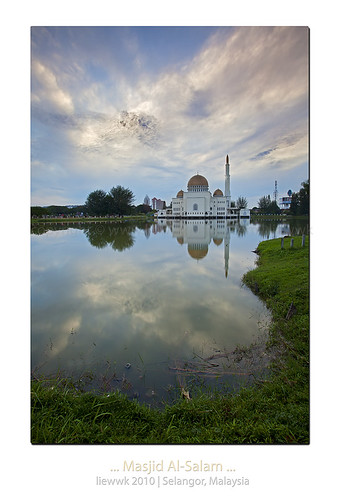
Landscape Spot - Masjid As-Salam
a beautiful gem found near by city where I live, all the this while I had miss DQ Mosque and dreaming of the beauty of the mosque (last visit March 2010).... below are some beautiful pictures of the mosque
Selangor
more pictures from the same Mosque click here
but I didn't know another beautiful Mosque (Masjid As-Salam) just ~15minutes drive from my house .... this Mosque is some where near Puchong Perdana, Puchong .... (can easily search Masjid Terapung at Puchong) and it have a lake just infront of the mosque which good for sunrise ...
- ~20minutes drive from Kuala Lumpur center
The lake give beautiful reflection while the wind is not strong ......
few capture from the beautiful mosque
more Kuala Lumpur (the city I stay) click here
Subscribe to:
Posts (Atom)